Keep a recipe's SOPs, quality forms, and per-step machine photos on the recipe itself, then print a batch sheet the floor can work from.
On this page
Was this helpful?
Real help from real food people
Chef Diego runs a real food plant. If this page didn't get you there, tell us — a person reads every message.
The written method for your marinara is a PDF on a shared drive, the photo of how
the mixer gets set lives on someone's phone, and the sheet the floor actually
works from is a photocopy of a photocopy. Bettr keeps all three on the recipe
itself — the documents an auditor asks for, the photos and clips that show how a
step is run, and a clean printout for the bench. You attach and print all of it
from Recipes.
Kitchen+
Documents and step media are added after a recipe is saved, so build the recipe
first — see Create a recipe — then open it to
attach files.
Attach a document by type
A recipe holds four documents, each in its own slot: the
document,
quality forms, safety procedures, and final product photos. One file per slot, so
the right paper always lands in the right place.
1
Open the recipe's Settings tab
From Recipes,
open the recipe and select Edit. On the edit screen, choose the
Settings tab. Below the external links you'll find the Documents
section with a slot for each type.
2
Upload into the matching slot
Select Upload File under the type you're attaching — say SOP document
— and pick the file. It uploads and the slot shows the filename with View
to open it. To swap a file, select Replace File on the same slot.
The SOP document slot on a recipe's Settings tab. Each of the four types — SOP document, quality forms, safety procedures, and final product photos — has a slot like this, and Upload File attaches one file to it.
Each slot takes a PDF, Word, Excel, image (JPG, PNG, or GIF), or text file of up
to 10MB. The format line sits right above the slots so you don't have to guess.
Sub-recipes carry one document
A sub-recipe — an intermediate mix that feeds other recipes — shows only the
SOP document slot. The quality, safety, and photo slots are for final
recipes, the ones that become a product you ship.
Add machine-setting media to a step
A production step can carry
, so the operator sees exactly what the
step should look like instead of guessing.
1
Give the step its equipment, then save
On the Production steps tab, a step needs a piece of equipment before it
can hold media — the media belongs to that step's machine. Select Choose
equipment on the step, pick the machine, and select Save.
2
Add a photo or video
Reopen the Production steps tab. Under the saved step you'll now see
Machine-setting media with an Add photo or video button. Select it and
choose the file. Add as many as the step needs; each one shows a thumbnail you
can open.
Media takes a photo (JPG, PNG, GIF, or WebP) or a video (MP4, MOV, or WebM) of up
to 50MB — bigger than a document, because a clip of a running line is worth more
than a paragraph describing it.
No equipment, no media
The Add photo or video button appears only after a step has equipment and
has been saved, because each clip is pinned to the step's machine. If you don't
see it, set the step's equipment and save first.
Remove a document or a clip
Both come off the recipe the same way — one action, and it's gone from the slot
right away, so only remove a file you mean to.
A document: open the Settings tab and select Remove on the slot.
The slot goes back to empty, ready for a new Upload File.
A clip: open the Production steps tab and select the trash icon on the
media thumbnail under the step.
The recipe keeps its history — removing a file is recorded like any other edit —
but the file itself no longer shows on the slot or the step.
Print a recipe for the floor
When the bench wants paper, print the recipe as a
.
1
Open Print recipe
From the recipe, select Print recipe. The sheet opens with the recipe's
allergens, its ingredients scaled to one full batch, and its production steps.
2
Set the batch you're making, then print
Type the amount you plan to make in the batch field at the top and select
Recalculate — every ingredient quantity rescales to that batch. Select
Print to send it to your printer.
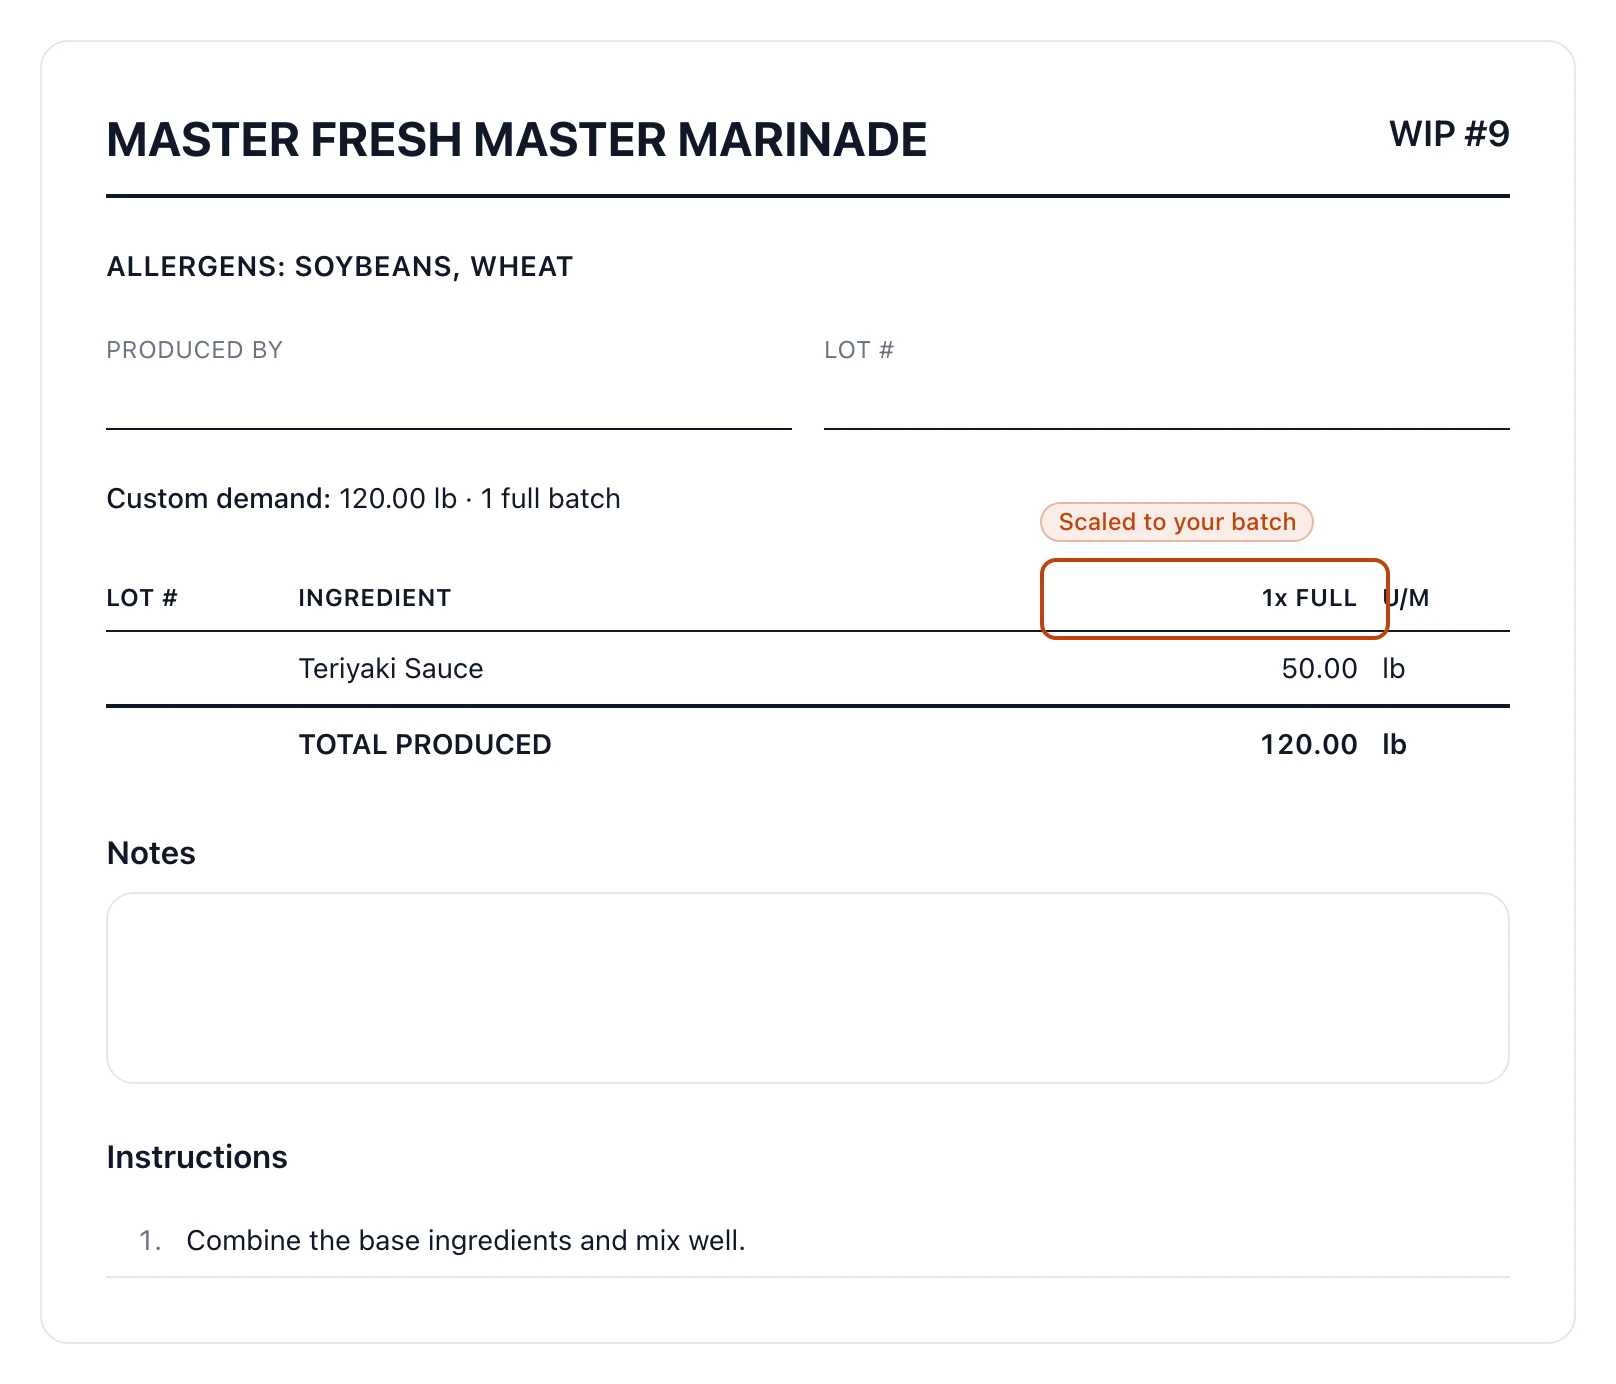
A recipe's batch sheet: the ingredient quantities scaled to a full batch, and blank Produced by and Lot # fields the crew fills in as they run it.
The sheet is built for traceability, not just the recipe. Every ingredient row has
a LOT # column and the header carries Produced by and Lot # blanks, so
the crew records what actually went into the batch as they make it — the same
detail a recall or an audit later depends on.
Print any batch size
Leave the batch field alone to print one full batch, or type a bigger or smaller
number and select Recalculate. Bettr scales every ingredient — and shows how
many full batches plus any partial the number works out to — so one recipe
prints for a small test run or a full day.