Bundle permissions into a role you can hand to a whole crew, change what it grants, manage who holds it, and remove it cleanly.
On this page
Was this helpful?
Real help from real food people
Chef Diego runs a real food plant. If this page didn't get you there, tell us — a person reads every message.
A role is a named set of permissions built around a job — a Kitchen Lead, a
Quality reviewer, a Buyer. Instead of ticking boxes for one person at a time,
you set the role up once and every hire in that job gets the same access the
moment you assign it. You build and manage your roles from
Roles.
Create a role
1
Open Roles and start a new one
In the sidebar, open Settings → Roles and select New. The New role
panel opens.
2
Name the role
Give it a name that matches a job on your floor — Kitchen Lead,
Quality, Buyer. Names are unique within your organization, so you can't
have two roles that share one.
3
Pick the default production view
Choose Operator view or Supervisor view. This decides which view a
person who holds the role opens a production run in — an operator weighs and
records the batch in front of them, a supervisor sees the whole run.
4
Tick the permissions
The permission catalog fills the rest of the panel, grouped by area —
Production, Warehouse & Inventory, Procurement & Sales, and the rest. Most
rights line up as Create, Read, Edit, and Delete on one kind of
record; a handful of one-off actions, like approving a purchase order or
shipping a sales order, sit as their own checkboxes. Tick everything this job
needs. Search by name to jump to a right, or use Select all and Clear
all.
5
Create the role
Select Create. The role joins the list, ready to assign.
What the roles list shows
Each role on the list carries its name, a badge for its default production view,
the number of members who hold it, and a few of the permissions it grants — with
a +N count when it grants more than the row can show. Point at a role's row to
reveal its actions: the key icon opens its permissions, the pencil edits
its name and view, and the trash deletes it.
Edit a role's name or view
1
Open the role for editing
Point at the role's row and select the pencil icon. The Edit role panel
opens with the current name and production view.
2
Change and save
Update the Name or Default production view, then select Save. This
panel changes only those two — a role's permissions live on their own screen, so
you can rename a role without touching what it can do.
Change what a role can do
A role's permissions live on their own screen, apart from its name. Change the
set once, and everyone who holds the role moves to it together — that's the
whole point of a role.
1
Open the permission editor
Point at the role's row and select the key icon. The Permissions panel
opens with the role's name at the top and the full catalog below.
2
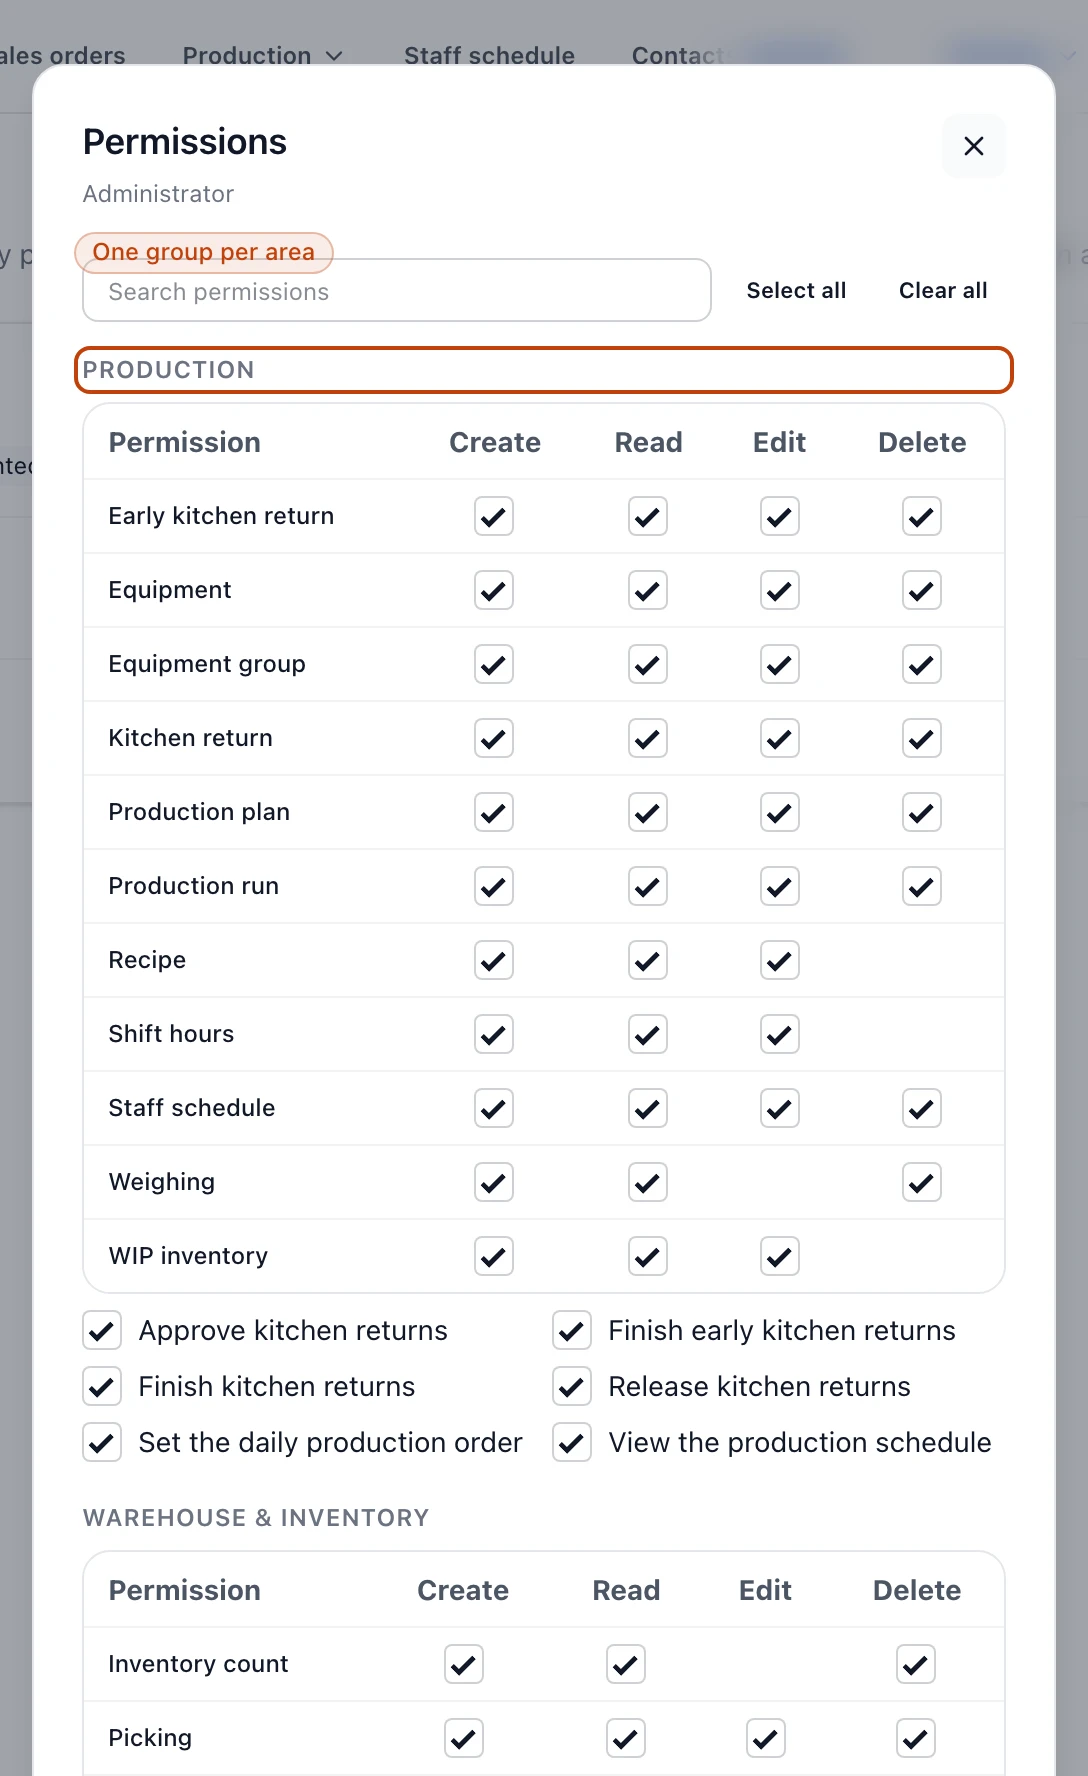
Tick and untick rights
The catalog is the same one you filled when you created the role — grouped by
area, with Create, Read, Edit, and Delete for each record and
one-off actions as their own checkboxes. Tick what to add, untick what to take
away. Use the search box, Select all, or Clear all to move quickly.
3
Save
Select Save. Everyone who holds the role is now on the new set of
permissions.
The permission editor groups every right by area, with Create, Read, Edit, and Delete checkboxes for each kind of record.
Editing permissions clears members' extras
Saving a change to a role's permissions also clears any
for everyone who holds it. They keep the role's new set; the one-off extras reset
to nothing. Grant those again if they're still needed.
Manage a role's members
1
Open the members list
Select the role's name to open its Members panel. It lists everyone who
holds the role, with an Add member menu at the top.
2
Add a member
Pick a person from Add member and select Add. The menu offers only
active members who don't already hold the role.
3
Remove a member
Select the × next to a person to take the role off them. They keep any
additional permissions you granted them directly — removing a role doesn't touch
those.
Assigning a role replaces the one they held
Each person holds one role at a time, so adding someone here replaces whatever
role they had and clears the additional permissions granted on top of it. Start
from the role that fits their job.
A role can also be named as a required approver on a recipe version. When it is,
the role's members are the people whose sign-off a new version needs — which is
why a role in use on recipes can't be deleted until you clear it from them.
Delete a role
Point at the role's row, select the trash icon, and confirm Delete.
When a role goes away, its members keep the permissions it granted them: the
rights move onto each person directly, so no one loses access the moment you
delete it. Assign those people a new role when you're ready.
A role in use on recipes can't be deleted
If a recipe still names the role as a required approver, Bettr Manager blocks the
delete and tells you how many recipes depend on it. Clear the role from those
recipes first, then delete it.
Roles vs one-off permissions
Reach for a role when more than one person does the same job: build it once, and
every hire in that job gets the same access from a single assignment. Reach for
additional permissions when one person needs a single right their role doesn't
carry — a Kitchen Lead who also reviews QC, say. The role is the baseline you
reuse across a crew; the extras are the exception for one person, and you grant
them next to each member on
User companies.