Give one person the right role, grant a few extra permissions on top when they need them, and see how the two combine into what they can do.
On this page
Was this helpful?
Real help from real food people
Chef Diego runs a real food plant. If this page didn't get you there, tell us — a person reads every message.
A role is the fastest way to say what someone can do — hand a new hire the
Kitchen Lead role and their access is set. When one person needs a little more
than their role covers, you grant a few permissions on top, just for them. Both
sit next to each person on
User companies.
Set someone's role
1
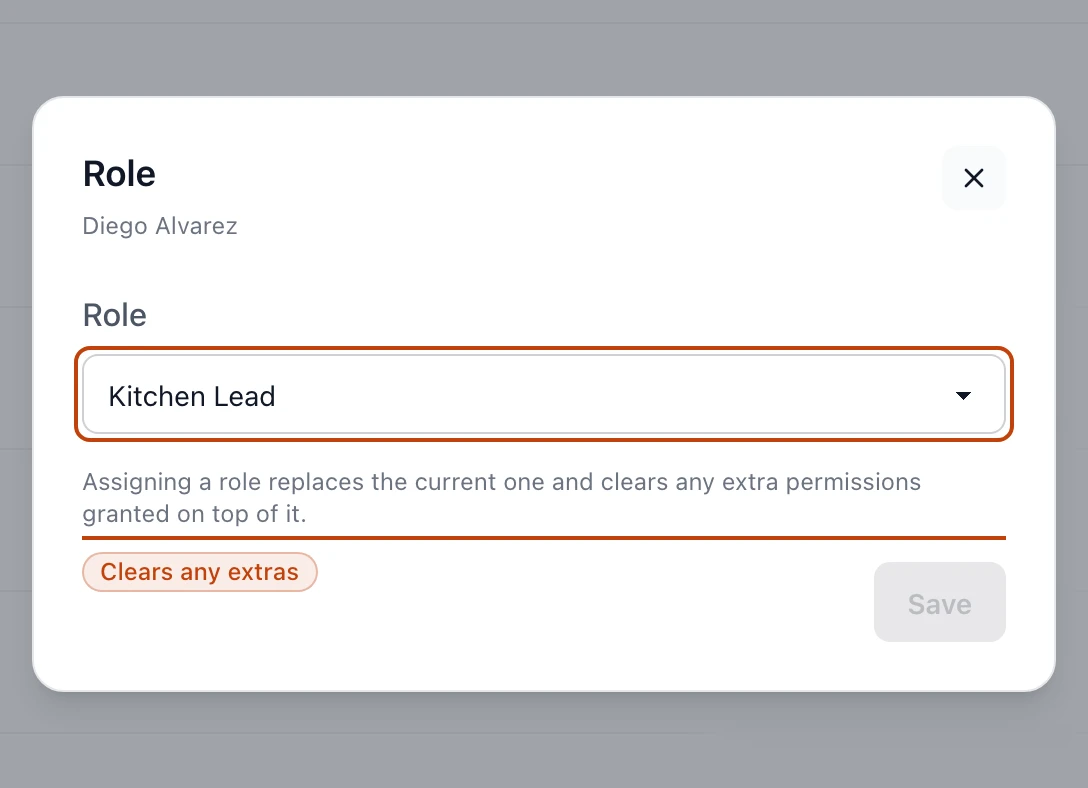
Open the role for a person
On Settings → User companies, find the person — type a first name into the
search box to narrow the list. Point at their row and select the shield
icon. The Role panel opens with their name at the top.
2
Pick a role
Choose a role from the Role menu. Every organization starts with an
Administrator role that holds every permission; the rest — a Kitchen
Lead, a Quality reviewer — are the ones you build to match your floor from
Roles. Pick No
role to leave the person without one.
3
Save
Select Save. It stays greyed out until you actually change the selection, so
you never re-save the role a person already holds.
The Role panel: pick from the roles you've built, then save. Assigning a role clears any extra permissions granted on top of it.
Each person holds one role at a time, so assigning a new one replaces whatever
they held before. The role does more than gate buttons — it also decides whether
that person opens a production run in the Operator or the Supervisor view.
Grant extra permissions on top
Sometimes one person needs a single right their role does not carry — a Kitchen
Lead who also reviews QC, say. You add it with
,
so nobody else who shares the role is affected.
1
Open Additional permissions
Back on User companies, point at the person's row and select the key icon.
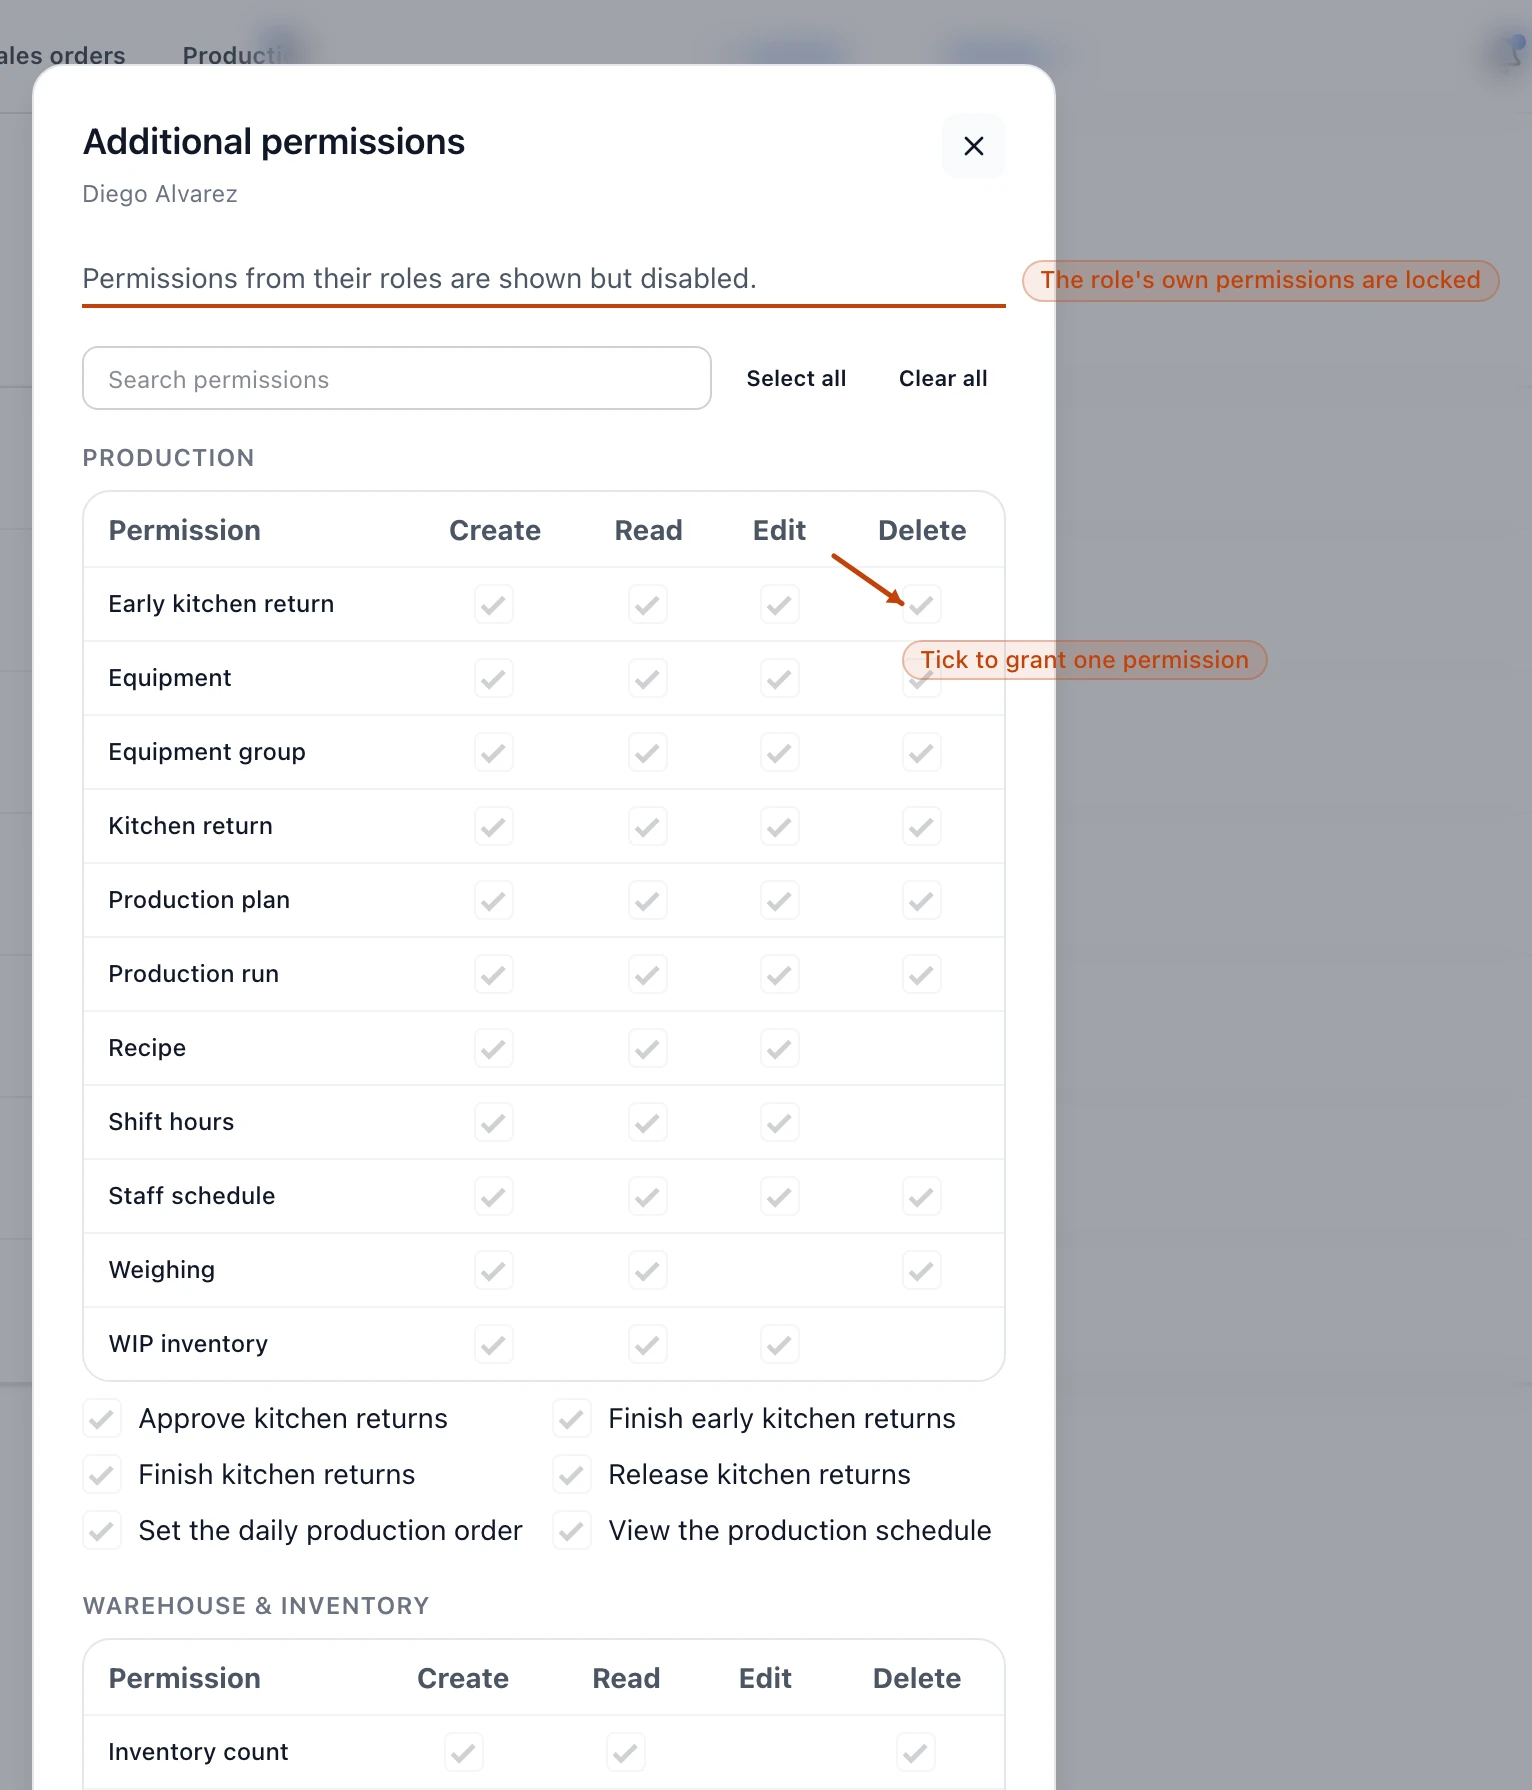
The Additional permissions panel opens with the full catalog, grouped by
area — Production, Warehouse & Inventory, Procurement & Sales, and the rest.
2
Tick what to add
Records line up in a grid with Create, Read, Edit, and Delete
columns; tick the boxes this person should have. Search by name to jump to a
permission, or use Select all and Clear all to tick everything or reset
to just their role. The permissions their role already grants show up ticked and
grayed out — you can add here, never take a role's permission away from one
person.
3
Save changes
Select Save changes. Their access is now their role's permissions plus
everything extra you ticked.
The Additional permissions grid, grouped by area with Create, Read, Edit, and Delete columns. Permissions a person's role already grants appear ticked and locked.
How a role and extra permissions combine
A person's real access is one simple sum: everything their role grants, plus
anything extra you added on top. The role is the baseline you reuse across a
whole crew; the extras are the exception for one person.
Because the role is the baseline, its permissions are locked in the Additional
permissions grid — always ticked, never editable there. That keeps a role
honest: on this screen you can only add to a person, so no one quietly loses a
permission their job depends on. To change what the role itself grants, edit the
role instead, and everyone who holds it moves together.
Changing a role clears the extras
Assigning a different role replaces the current one and wipes every extra
permission you granted on top. Start from the role that fits the job, then layer
on only the one-off rights that person genuinely needs.
Take a role or permission back
To remove someone's role, open the Role panel, choose No role, and save.
They keep only the extra permissions you granted them directly — clearing a role
does not touch those.
To take back an extra, open Additional permissions, untick it, and select
Save changes. You can only untick the extras; a role's own permissions stay
locked. Clear all followed by Save changes strips every extra at once and
leaves the person with just their role.